Tag: Tutorial
-
Setting up a Python Virtual Environment for Web Development
Virtual Environments are helpful in keeping all the dependencies (packages), required for a Python project, in one place. So you can avoid issues with conflicting dependencies when working on different projects simultaneously. For instance, one major use case is when you want to run different Python versions like 2.7, 3.5, and 3.6 on the same…
-
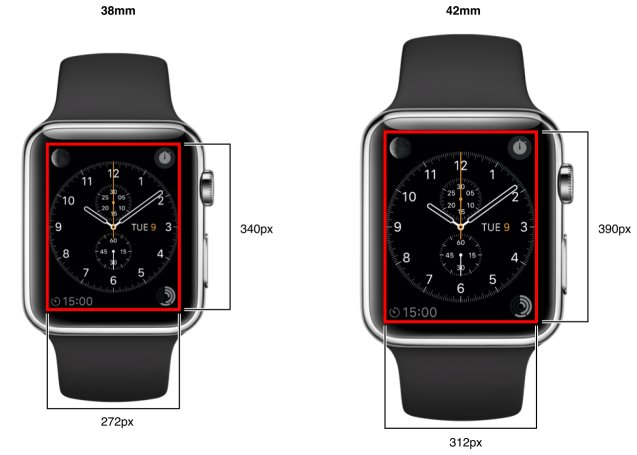
Designing the Apple Watch UI – a quick guide
The Apple Watch is releasing in a month! Here’s a list of important things you need to know, if you’re interested in designing or developing an Apple Watch App: 1. Layout and Screen Sizes 38mm: 340 pixels x 272 pixels 42mm: 390 pixels x 312 pixels That’s an aspect ratio of 4:5. 2. Icon…
-
Navigating large codebases and contributing to Open Source
(I wrote the following as an email to a someone who asked me for advice. So it’s verbose and written with a personal tone.) I. Setup your system and build the project code Pick any good Integrated Development Environment (IDE). I like VS Code. You can work on any langauge in VSCode be it C++,…